

Installing a video surveillance system means selecting the right cameras for each location, routing power and data connections, connecting cameras to a recording device (NVR or DVR), configuring storage and remote access, and setting up alerts — all as a single, coherent system rather than a collection of independent devices.
Many organisations approach video surveillance as a hardware purchase rather than a system design exercise, and the result is predictable: blind spots, unreliable recordings, footage that cannot be retrieved quickly when an incident occurs, and cameras that go offline without anyone noticing. The physical installation is only one part of the challenge. Storage capacity, network bandwidth, access permissions, alert logic and ongoing maintenance all determine whether a system actually delivers security value or simply creates a false sense of protection.
A properly planned and installed video surveillance system gives you reliable evidence when you need it, centralised visibility across every site you operate, and the operational responsiveness to act on incidents rather than discover them after the fact. This guide covers the full process — from coverage design and cabling choices to NVR/DVR configuration, cloud storage, remote monitoring and post-installation maintenance — so you can make informed decisions at every stage.
Planning your video surveillance system: coverage, locations and camera types
Before ordering a single camera, define what you are protecting and from what. A warehouse perimeter has different requirements from a server room, a retail floor or a school entrance. The number of cameras, their resolution, their field of view and their mounting positions all follow from a clear coverage goal — not from a product catalogue.
At Impulso Tecnológico, every video surveillance installation begins with a site assessment that maps the physical environment against operational needs. This centralised management mindset means camera fleets are designed to be administered without chaos from day one, with secure access and consistent visibility across single or multiple sites. Rather than adding cameras reactively, we build systems that are scalable, logically structured and aligned with the broader IT and security infrastructure already in place.
| Planning criterion | Indoor environment | Outdoor / perimeter | Multi-site / distributed |
|---|---|---|---|
| Typical resolution | 2–4 MP (1080p–4K) | 4–8 MP for wide coverage | Standardised per zone type |
| Field of view priority | Narrow corridors, doorways | Wide-angle perimeter, PTZ for large areas | Consistent overlap between sites |
| Lighting conditions | Controlled artificial light | Variable; IR or low-light required | Site-specific, managed centrally |
| Power delivery | PoE via internal network | PoE+ or local power with weatherproofing | PoE switches per site, centralised NVR or cloud |
| Storage approach | Local NVR or cloud | Local NVR + cloud backup recommended | Cloud-managed with unified dashboard |
| Scalability need | Low to medium | Medium | High — fleet management essential |
Coverage design: mapping entrances, blind spots and viewing angles
Start with a floor plan or site map and mark every entrance, exit, high-risk zone and area where a blind spot would create a security gap. Entrances and exits are non-negotiable coverage points — they capture who enters and leaves, and they provide the clearest footage for identification. Perimeters, loading bays, car parks and server rooms typically follow. Once primary zones are marked, identify where camera fields of view overlap to eliminate blind spots, and note any line-of-sight obstructions such as pillars, shelving units or trees. A camera mounted at the wrong angle due to poor planning will produce footage that is technically recorded but operationally useless. Viewing angle calculations — typically 90° to 120° for wide-angle lenses — should be mapped against the physical dimensions of each zone before finalising mounting positions.
Choosing camera types: indoor, outdoor, fixed vs PTZ, and lens considerations
Camera type selection is driven by environment, lighting and expected movement patterns. Indoor fixed cameras with a 2–4 MP sensor and a standard wide-angle lens cover most corridor and room scenarios efficiently. Outdoor cameras require an IP66 or IP67 weatherproof rating as a minimum, and infrared (IR) or low-light capability for reliable night-time footage. PTZ (pan-tilt-zoom) cameras are appropriate for large open areas — car parks, warehouses, open-plan floors — where a single camera needs to cover a wide zone and operators may need to track movement in real time. For IP camera installation, varifocal lenses give installers flexibility to adjust the field of view after mounting without replacing hardware. Fisheye cameras can cover an entire room from a ceiling mount, reducing camera count in square environments. Matching camera type to the specific environment avoids over-specification in low-risk zones and under-specification where it matters most.
System requirements checklist: number of cameras, mounting constraints and budget trade-offs
Once coverage zones are mapped and camera types selected, translate the design into a system specification. Calculate the total camera count, then determine mounting constraints for each position: ceiling, wall, pole or corner mount, and whether conduit or surface-mounted cable trunking is required. Budget trade-offs are real — higher-resolution cameras consume more storage and bandwidth, which affects NVR capacity and network infrastructure costs. Plan for scalability from day one: a system that cannot accommodate additional cameras without replacing the NVR or upgrading the network switch is a system that will create friction as the business grows. For organisations managing multiple sites, centralised management capability — where camera fleets across locations are administered from a single platform — should be a baseline requirement rather than an optional upgrade. This is the approach Impulso Tecnológico applies across every multi-site installation it delivers in Spain and Portugal.
Wired vs wireless installation: power, cabling and connection paths
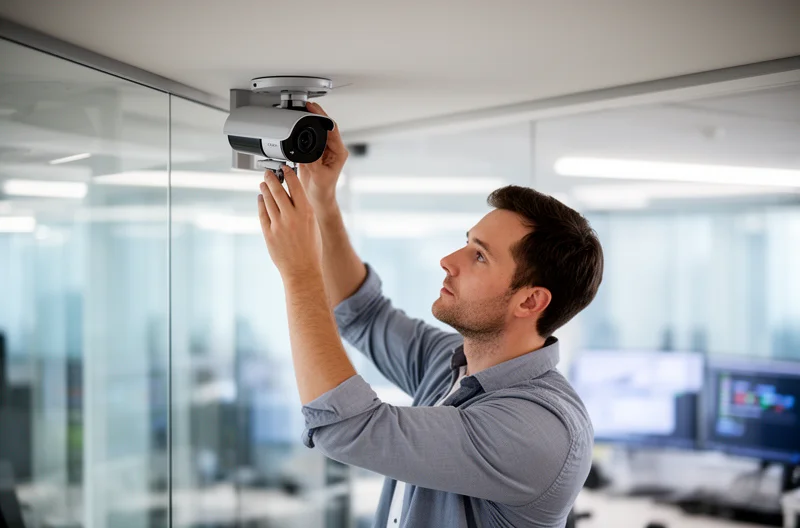
The choice between wired and wireless installation is not primarily about convenience — it is about reliability, bandwidth consistency and long-term maintenance effort. PoE (Power over Ethernet) wired systems deliver both power and data over a single Cat5e or Cat6 cable, which simplifies installation and eliminates the need for separate power supplies at each camera. Analog systems use RG59 siamese cable, carrying video signal and power in parallel runs to a DVR. Wi-Fi cameras rely on your existing wireless network, while wire-free (battery-powered) cameras eliminate cabling entirely but introduce power management as an ongoing operational task.
At Impulso Tecnológico, installations are designed for efficient operation and streamlined incident management from day one. That means choosing connection paths that reduce operational friction — not just during installation, but across the full lifecycle of the system. The installation path you choose directly affects how quickly footage can be retrieved, how reliably cameras stay online, and how much maintenance effort the system demands over time.
- Assess the physical environment — identify walls, ceilings and conduit routes before committing to wired or wireless paths.
- Confirm network infrastructure — verify switch capacity, PoE budget and available ports for wired IP camera installation.
- Plan power delivery per camera — PoE for IP cameras, separate power runs for analog, battery cycles or hardwired mains for wire-free.
- Map cable routes — plan conduit or trunking paths to protect cables from physical damage and weather exposure.
- Validate wireless signal strength — for Wi-Fi cameras, conduct a site survey before finalising mounting positions.
- Document the installation — record cable runs, IP addresses, switch ports and camera IDs for future maintenance and troubleshooting.
PoE and analog cabling basics: power + data routing and connection discipline
PoE security camera setup is the dominant wired approach for modern IP systems. A single Cat5e or Cat6 Ethernet cable carries both the data stream and up to 30W of power (PoE+) from a managed switch or NVR with built-in PoE ports directly to the camera. This eliminates the need for a power outlet at each mounting point, simplifies cable management and makes fault diagnosis straightforward — if a camera goes offline, the issue is isolated to a single cable run or switch port. Analog systems use RG59 siamese cable: a coaxial conductor for video signal and a parallel power wire, both terminated with BNC connectors at the DVR. Analog runs can extend up to 300–500 metres without signal amplification, which makes them viable for large sites where cable runs are long. Connection discipline — labelling every cable at both ends, documenting switch port assignments and maintaining a cable schedule — is what separates a maintainable system from one that becomes unmanageable within twelve months.
Wi‑Fi and wire-free options: placement, battery/hardwired power and connectivity risks
Wireless video surveillance installation reduces drilling and cable routing, but it introduces dependencies that wired systems avoid. Wi-Fi cameras connect to your existing wireless network and require a mains power outlet at the mounting point — they eliminate data cabling but not power cabling. Wire-free cameras run on rechargeable or replaceable batteries and transmit wirelessly, making them genuinely cable-free, but battery life varies significantly with motion frequency, video resolution and temperature. A camera in a high-traffic zone may require recharging every two to four weeks; one covering a low-activity area may last several months. Wireless connectivity risks include signal attenuation through thick walls or metal structures, interference from other 2.4 GHz or 5 GHz devices, and the potential for connectivity drops that interrupt recording. Before committing to a wired vs wireless CCTV installation decision, conduct a wireless site survey to measure signal strength at each proposed mounting position. For business-critical zones, wired PoE remains the more reliable choice.
Field installation planning: weatherproofing, obstruction-free views and protected cable runs
Outdoor cameras should be mounted at a height of 2.5 to 3.5 metres — high enough to prevent tampering, low enough to capture usable facial or vehicle detail. Position cameras under eaves, canopies or purpose-built housings to reduce direct rain exposure and lens contamination, even when the camera carries an IP66 weatherproof rating. Avoid mounting positions that point directly into strong light sources — morning or evening sun, reflective surfaces, or bright artificial lighting — as these will wash out footage and reduce identification quality. Cable runs exposed to outdoor conditions must be routed through UV-resistant conduit or armoured trunking; unprotected cables degrade within months in direct sunlight or wet environments. Inside buildings, surface-mounted trunking or in-wall conduit keeps cable runs tidy, protects against accidental damage and makes future maintenance straightforward. Every cable entry point through an external wall should be sealed with weatherproof gland fittings to prevent water ingress into the building fabric or the camera housing.
Connecting, storing and monitoring: NVR/DVR, apps, alerts and maintenance
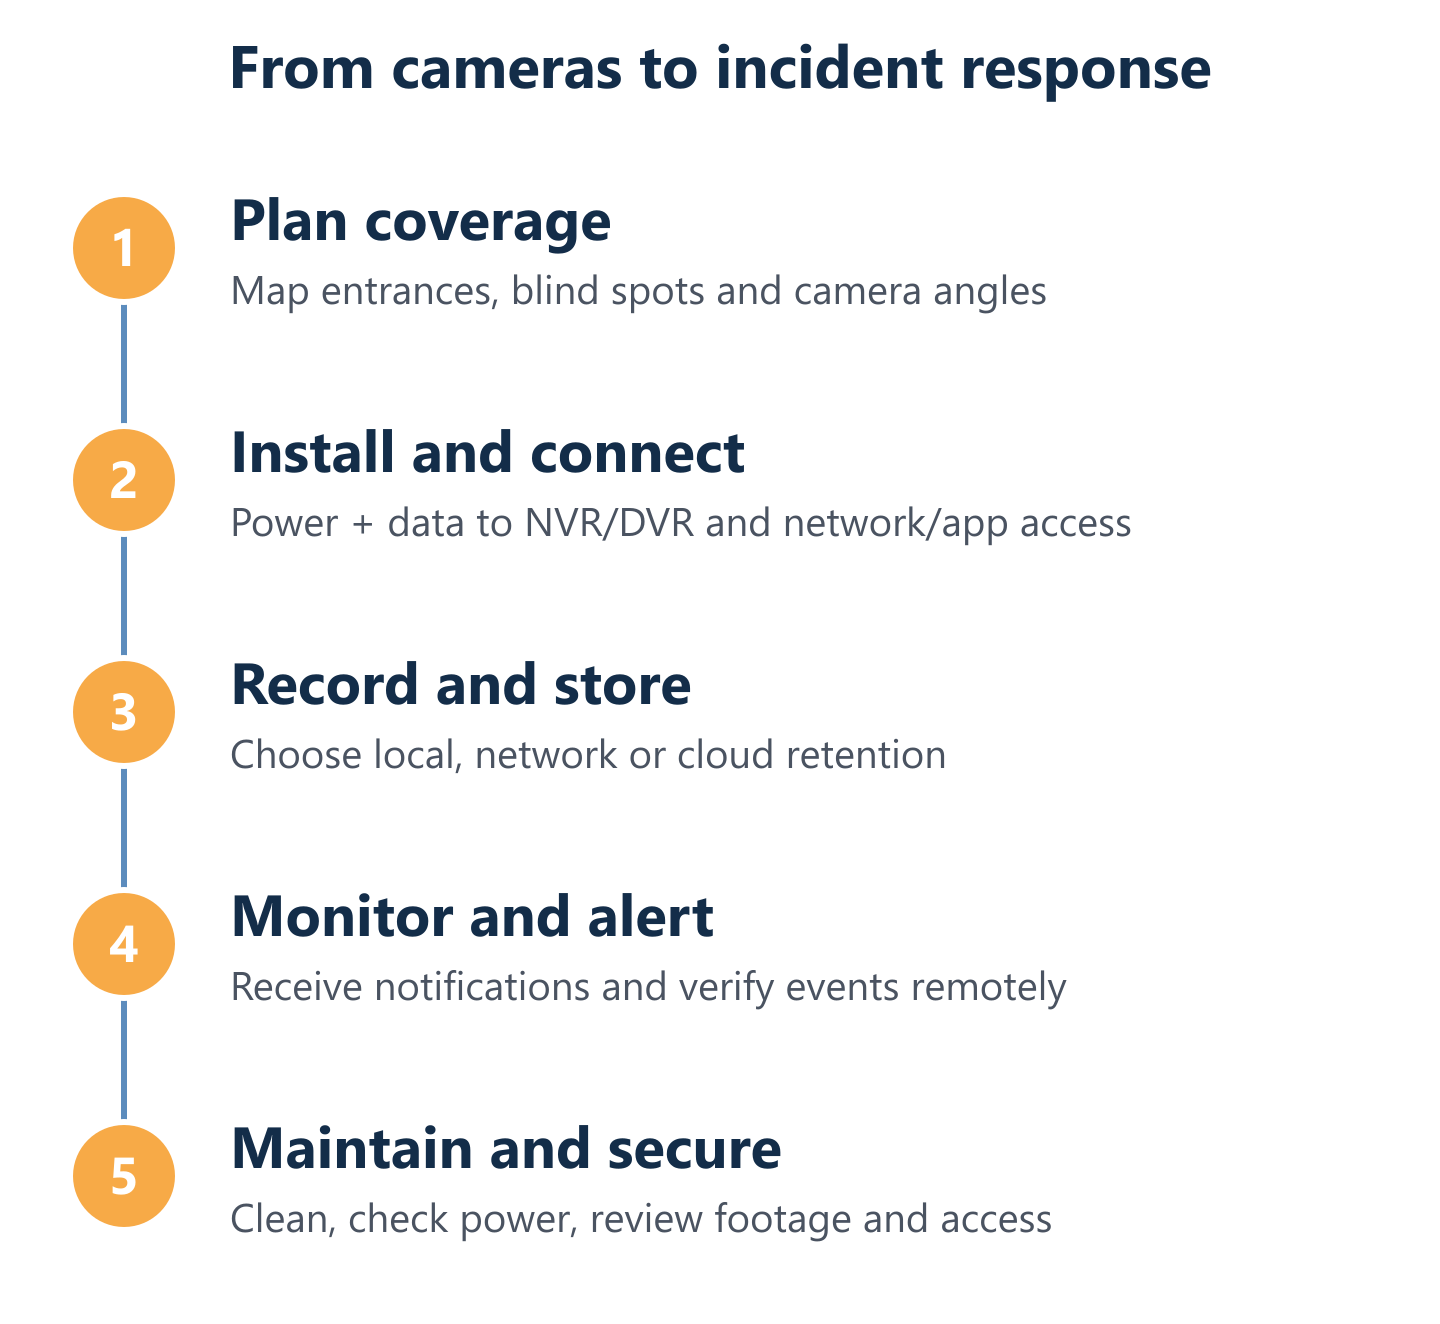
Once cameras are physically installed and powered, the system needs to be configured end-to-end: cameras connected to a recording device, storage sized and structured, remote access enabled, and alerts configured so that the right people are notified when something happens. This is where many installations fall short — the hardware works, but the operational layer is incomplete, meaning footage cannot be found quickly, offline cameras go undetected, and incident response is slower than it needs to be.
Impulso Tecnológico's managed oversight approach addresses this directly. Working with Verkada as our video surveillance management platform, we implement centralised management that gives teams a unified view across all devices and sites. Secure remote access means authorised users can view live or recorded footage from any location without exposing the system to unnecessary risk. Quick footage search and consolidated incident reporting reduce the time between an event occurring and a team member acting on it. AI-based video analytics, motion plotting and customised alerts — including notifications for offline cameras or unusual activity patterns — support proactive operations rather than reactive discovery.
- Recording device selection: NVR for IP cameras (network-based); DVR for analog cameras (coaxial-based); hybrid recorders for mixed environments.
- Storage sizing: Calculate retention period × camera count × bitrate to determine required capacity before purchasing hardware.
- Remote access configuration: Set up secure user accounts with role-based permissions; avoid port-forwarding in favour of VPN or cloud-managed access.
- Alert logic: Configure motion zones, offline camera detection and activity threshold alerts to reduce false positives while catching genuine events.
- Cloud backup: Enable cloud archiving for critical footage to ensure evidence survives local hardware failure.
- Incident workflow: Define who receives alerts, how footage is retrieved, and how incidents are logged and reported.
Camera to recorder to viewing: NVR/DVR setup and remote access workflow
The NVR vs DVR decision follows directly from the camera technology chosen. IP cameras connect to an NVR via Ethernet — either through a dedicated PoE switch or directly into PoE ports on the NVR itself. The NVR assigns IP addresses, receives the video stream, and writes footage to internal or attached storage. Analog cameras connect to a DVR via coaxial BNC connectors; the DVR digitises the signal and handles recording. In both cases, the recorder connects to your local network, enabling remote viewing through a web browser or mobile application. Remote access should be configured using secure, authenticated connections — cloud-managed platforms like Verkada eliminate the need for port-forwarding by routing access through an encrypted cloud layer. For multi-site environments, a single dashboard that aggregates all recorders and cameras into one view is operationally essential; logging into individual NVRs per site is not scalable and creates visibility gaps between locations.
Storage and alerts: local vs network vs cloud, plus incident notifications and offline camera detection
Storage architecture determines how long footage is retained, how quickly it can be searched, and what happens when local hardware fails. Local storage (HDD within an NVR or DVR) is cost-effective for short retention periods but vulnerable to physical damage, theft or hardware failure. Network-attached storage (NAS) extends capacity and can be configured with RAID redundancy, but remains on-site. Cloud video surveillance adds off-site resilience — footage is retained in a geographically separate location, accessible remotely and searchable without physical access to the recorder. Impulso Tecnológico's installations include 30-day cloud backup as standard, with unlimited cloud archiving available for footage that needs to be preserved beyond the standard retention window. Alert configuration is equally important: motion-triggered notifications, offline camera detection and activity threshold alerts should be tuned to the specific environment to avoid alert fatigue. Real-time mobile alerts for offline cameras are particularly valuable — an undetected camera failure creates a security blind spot that may not be discovered until footage is needed.
Maintenance and security after installation: cleaning, battery checks, access control and upkeep routines
A video surveillance system that is not maintained will degrade predictably. Outdoor camera lenses accumulate dust, pollen, spider webs and water marks — all of which reduce image quality without triggering any alert. Cleaning lenses every one to three months, depending on the environment, is a minimum maintenance task. For wire-free cameras, battery status should be monitored centrally and batteries replaced or recharged before they reach critically low levels. Firmware updates for cameras, NVRs and network switches should be applied on a regular schedule to address security vulnerabilities — an unpatched camera is a potential entry point into your network. Access control for the surveillance system itself matters as much as the cameras: user accounts should be reviewed periodically, default credentials must be changed at installation, and role-based permissions should limit who can view, export or delete footage. Integrating video surveillance with broader IT maintenance routines — as part of a preventive IT maintenance programme — ensures that upkeep tasks are scheduled, documented and completed consistently rather than addressed only when something fails.
A video surveillance system planned and installed as a complete solution — from coverage design and cabling through to recording, storage, alerts and maintenance — delivers something a collection of cameras never can: reliable evidence, faster incident response, and consistent visibility across every site you operate. Impulso Tecnológico brings over 25 years of IT and infrastructure experience to video surveillance projects across Spain and Portugal, combining physical installation with managed, secure oversight so that your system works as hard on day 365 as it does on day one. If you are planning a new installation or reviewing an existing system, the right starting point is a conversation about what you need to protect and how your team needs to operate.